This is the third post in my series where I explore the world of serverless Azure. I am doing this by building a webhook proxy application using only the serverless Azure services. In the first two posts, I built and deployed an Azure function that receives the webhooks and validates the request body against the corresponding schema. In this post, I look at using Azure API Management (APIM) in front of that function.
Why use API Management?
As we saw in the previous post, the Azure function is accessible from the public internet provided you know the appropriate API key. So why would you need a service such as API Management? A few reasons are listed below.
- Rate limiting, ensuring fair usage among consumers
- Subscription-level control, such as key rotation
- Advanced security, such as OAuth 2.0
API Management has many more features that we won't explore in this post, but include the following:
- Centralized management of APIs
- Customizable API facades
- API Documentation and Developer Portals
- API Analytics and Insights
- Caching Mechanisms
- Versioning and Revision Control
I find so much in software design is down to positioning. By using a service such as API Management, we will position ourselves to provide production-level API.
Are there any alternatives?
As with other cloud providers, Azure offers services that somewhat overlap in what they offer. In this case, ChatGPT was able to offer the following options amongst some others:
Azure Application Gateway with Web Application Firewall (WAF)
Use Case: If you're primarily looking for API gateway capabilities with security features like a Web Application Firewall, SSL termination, and URL-based routing.
- Why Use Over APIM: Offers Layer 7 load balancing with built-in WAF for security-focused scenarios, especially where protection against common web vulnerabilities and exploits is a priority.
Azure Functions Proxies
Use Case: For lightweight API orchestration or when you need a simple facade in front of multiple Azure Functions.
- Why Use Over APIM: It's a simple solution to create a single API surface for multiple microservices, particularly when these services are implemented using Azure Functions. However, it's less feature-rich compared to APIM.
Azure Front Door
Use Case: For global routing and load balancing needs, offering capabilities like URL-based routing, SSL termination, and global load balancing.
- Why Use Over APIM: It is more focused on content delivery, global routing, and ensuring high availability and performance for your web applications and APIs.
Given the API-focused nature of the application I am building, and the cost, API Management seems to be a good fit.
Creating the API Management instance
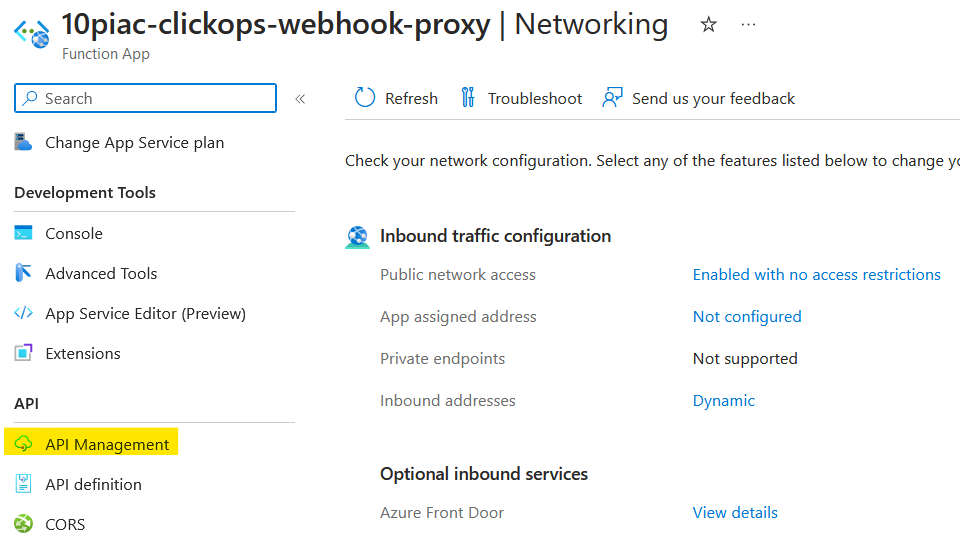
Using the Expose serverless APIs from HTTP endpoints using Azure API Management article as a guide, I opened up the Azure portal and navigated to my function app and selected the API Management blade.
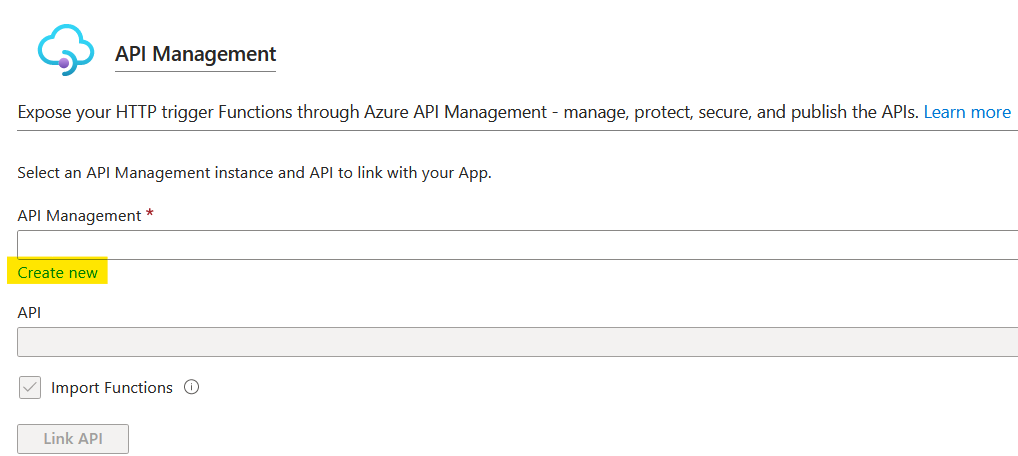
This brought up the following option to create a new API Management instance.
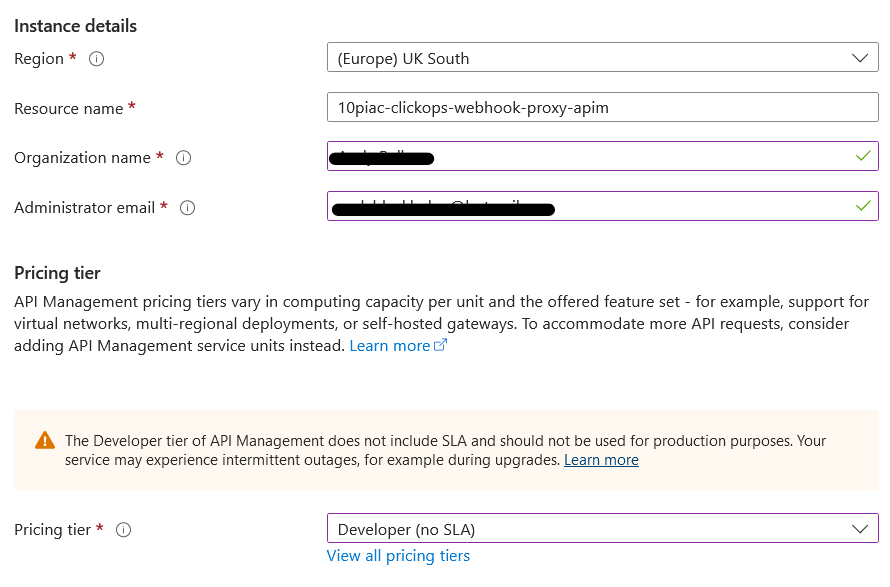
Clicking on 'Create new' brought up the following UI. The Region and Resource name were defaulted and I filled in the other details. To save money, I chose the 'Developer' pricing tier noting that there is no Service Level Agreement (SLA) for this tier.
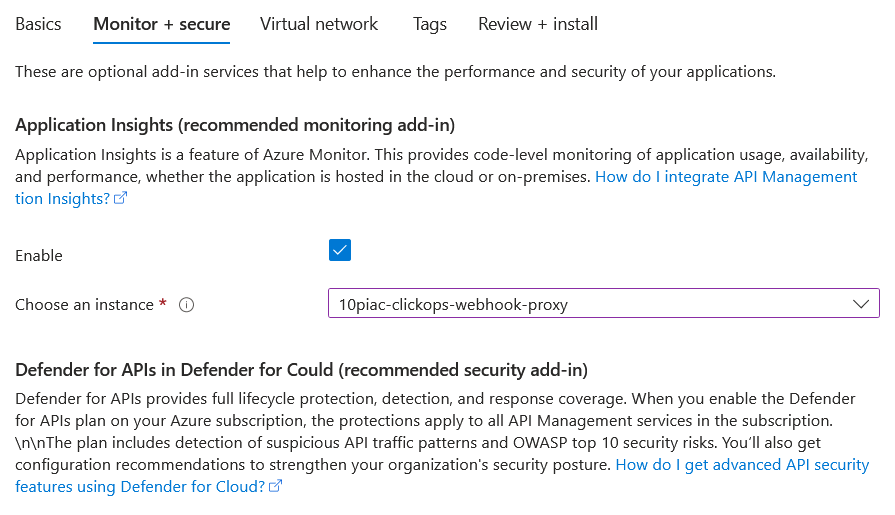
The next step gave the option to link the new instance with Application Insights and utilise 'Defender for Could' (sic). I enabled the former, but there wasn't an option to enable the latter. This may have been due to using the cheapest tier.
The final step was to choose the network connectivity. As this is to be a public endpoint, I chose 'None'.

After clicking 'Create' and waiting a while, the new API Management instance was ready to be connected to the function and expose the API.
Exposing the Azure function as an API
Now when I selected the API Management blade from the function app, it reported that it was now linked with the new instance. However, it had not imported anything automatically and presented me with the option to create a new API.
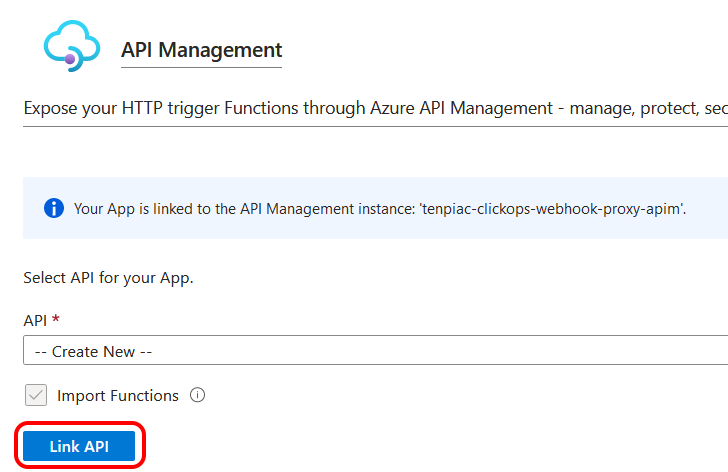
There was nothing promising in the API dropdown, so I selected 'Create New' and clicked on 'Link API'. I was then presented with the following list of Azure Functions.

Now this was looking more promising. The wizard appears to have recognised my Azure Function. I selected it and tried to progress. However, rather confusingly, I was then prompted to 'Define a new API' by selecting from a list of potential sources. This wasn't what I was expecting, but I selected 'Function App' and clicked to progress.
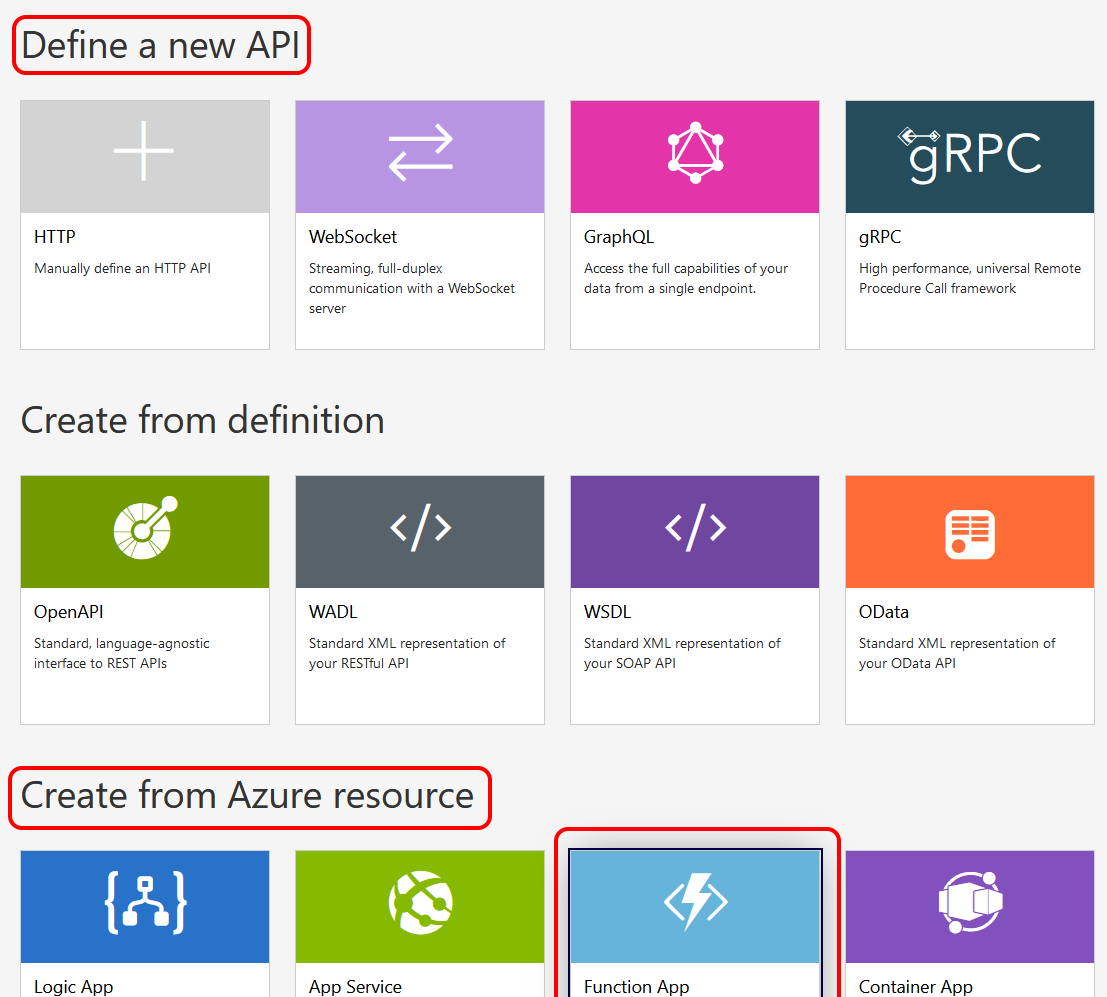
When I was presented with the next screen, I felt that I had somewhat gone round in a circle. It looked very similar to one earlier when my Azure Function was listed. However, I decided to click 'Select' and continue.
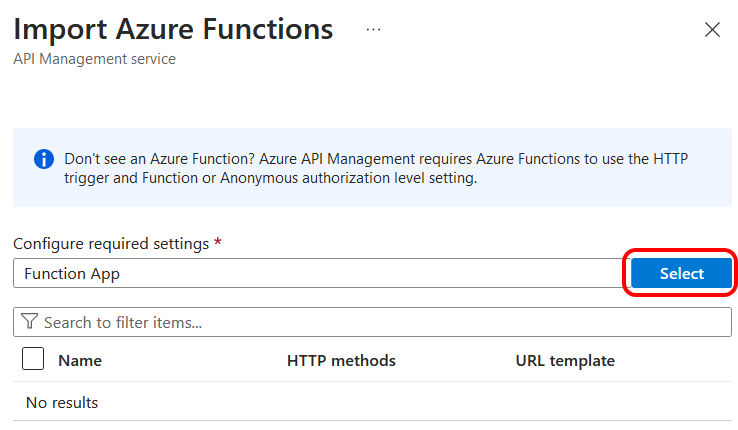
I was then presented with a list of Function Apps from which to import functions. I selected my Function App and clicked to progress.

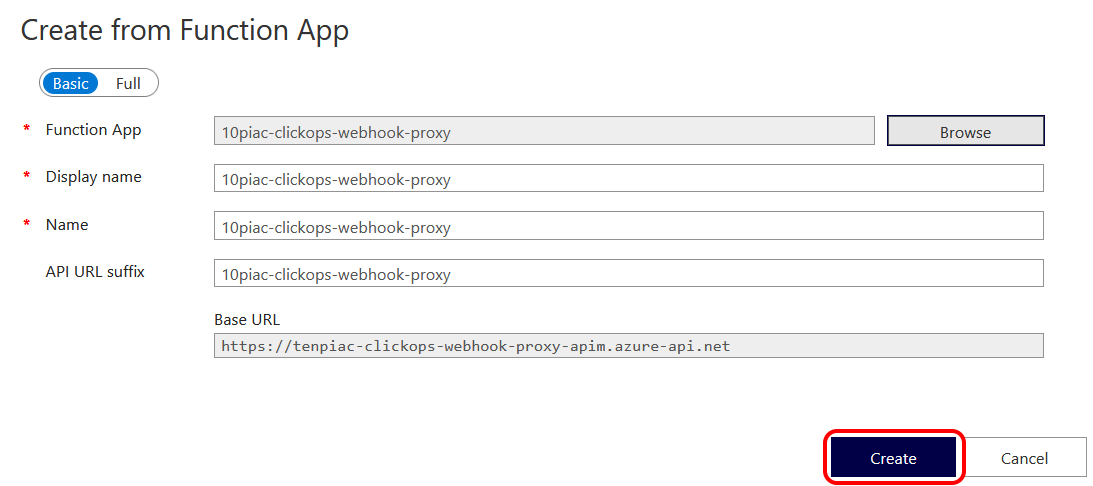
The next step defaulted in a set of values, which all seemed reasonable to me. So I simply clicked 'Create'.
Once the creation was complete, I was able to view the 'Design' page for the new API and see the integration with the Azure Function in the backend. I could see how the process had recognised the request parameters and I also noticed the 'Inbound processing' box mentioned modifying the request. Also in the 'Inbound processing' box was the option to add policies. These, it turns out, are where you can do things such as filtering by IP address or rate limiting by key.
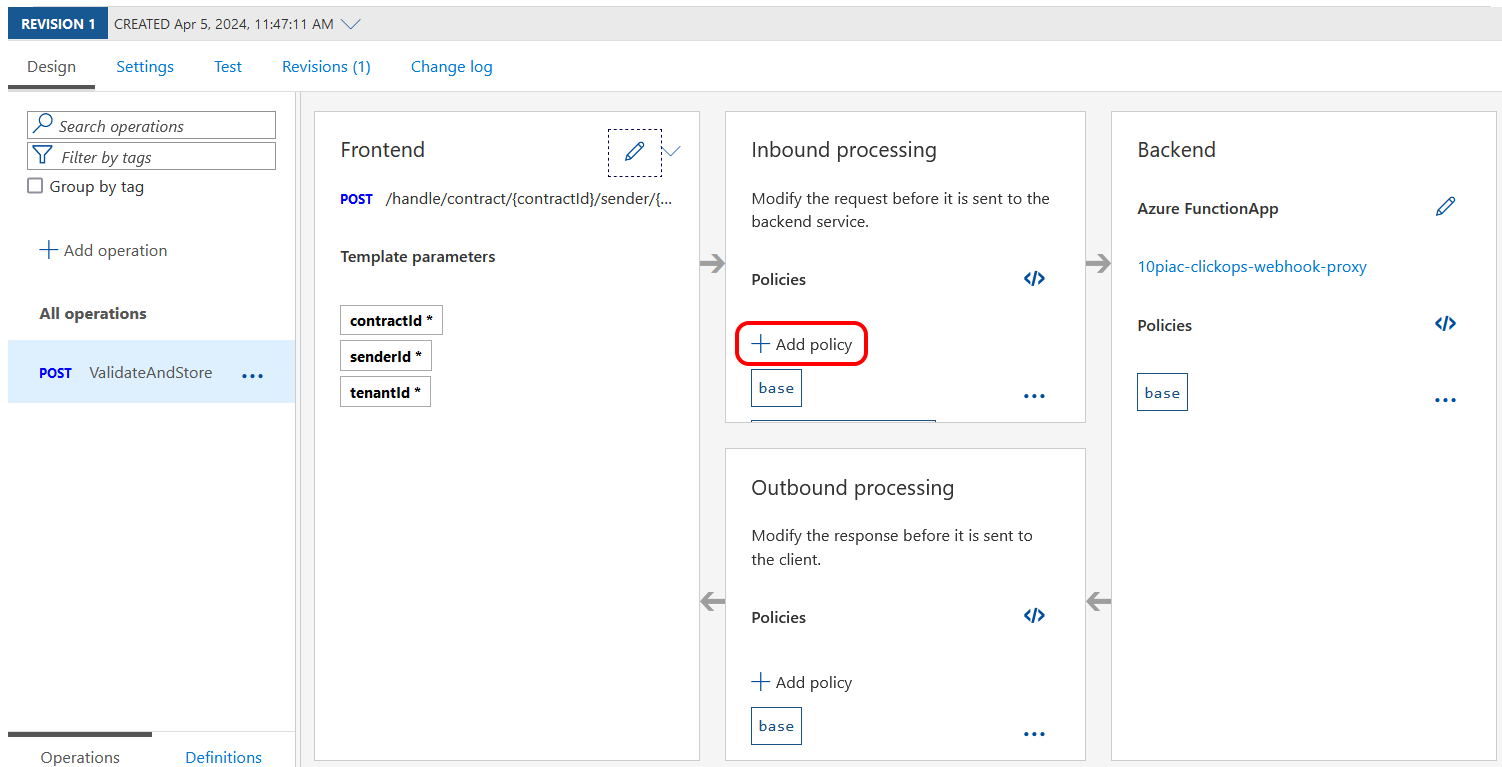
My eye was also caught by the 'Test' tab, so I clicked on it and gave it a go.
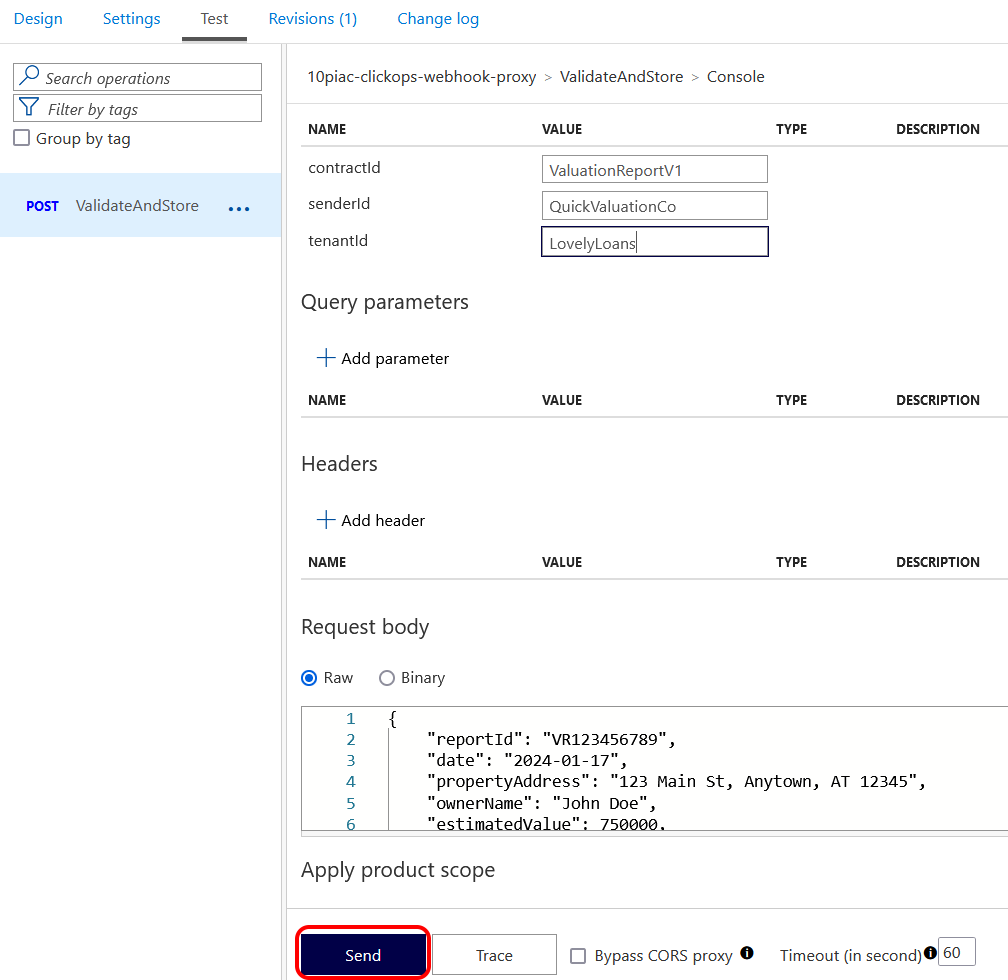
The response below showed that my Azure Function had been successfully called through the new API Management instance. So after quite a bit of clicking, it looks like I had managed to achieve my first aim.

I was a bit curious as how API Management was authorised to access my Azure Function. A bit of searching found this in the Authorization section of a Microsoft article:
Import of an Azure Function App automatically generates:
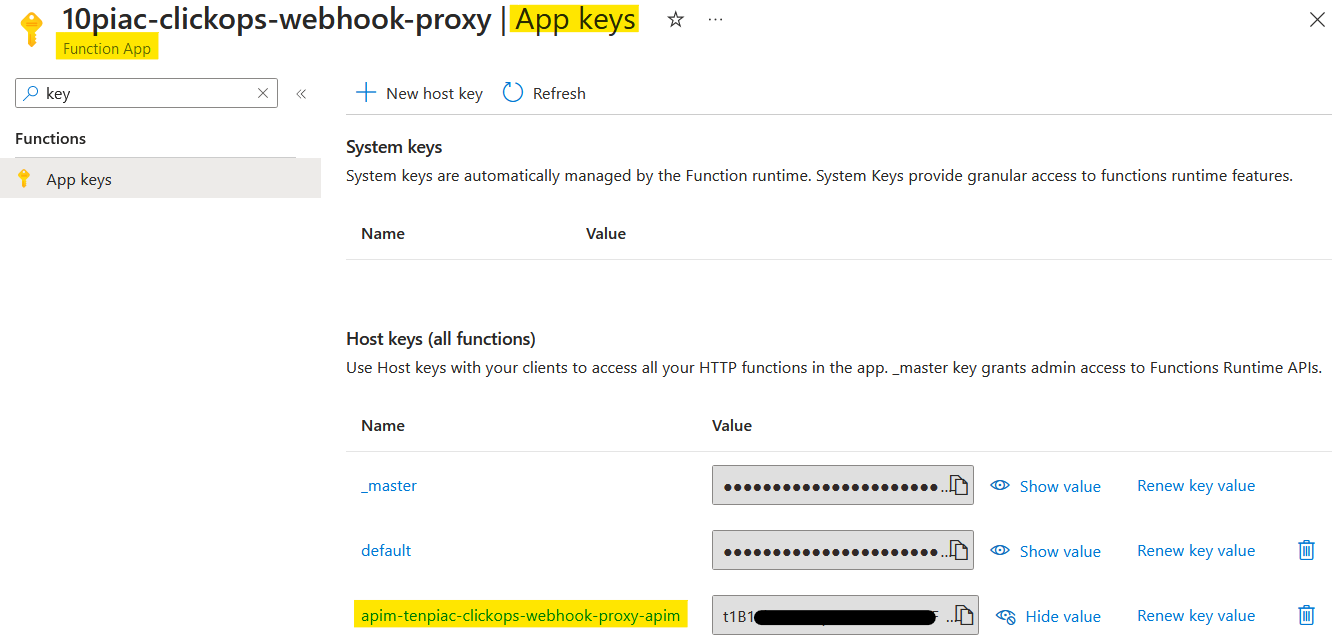
- Host key inside the Function App with the name apim-{your Azure API Management service instance name},
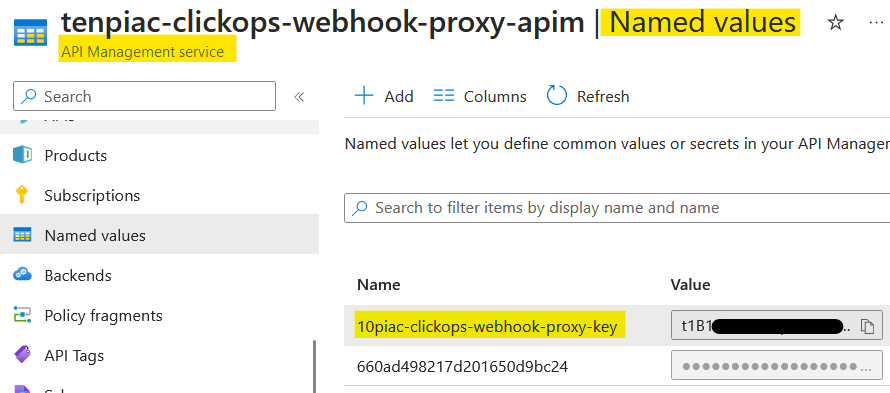
- Named value inside the Azure API Management instance with the name {your Azure Function App instance name}-key, which contains the created host key.
Sure enough, when I looked in the portal, I could see the following App key in my Function App.
And in the API Management instance, I found the same value as a 'Named value' with the expected name.
Ideally, I would like to used a Managed Identity and grant this identity access to the Azure Function. This method is more secure and manageable than function keys, but is only available to Premium Tier instances. So, for now, we will go with function keys.
Creating tenant-specific subscriptions
The Azure portal test had shown that the function was successfully integrated with API Management. The next test was to invoke it from outside of the Azure portal. As it happens, the Azure portal test UI has a feature that makes this easy. There is an option to copy the test HTTP request, which is highlighted below.
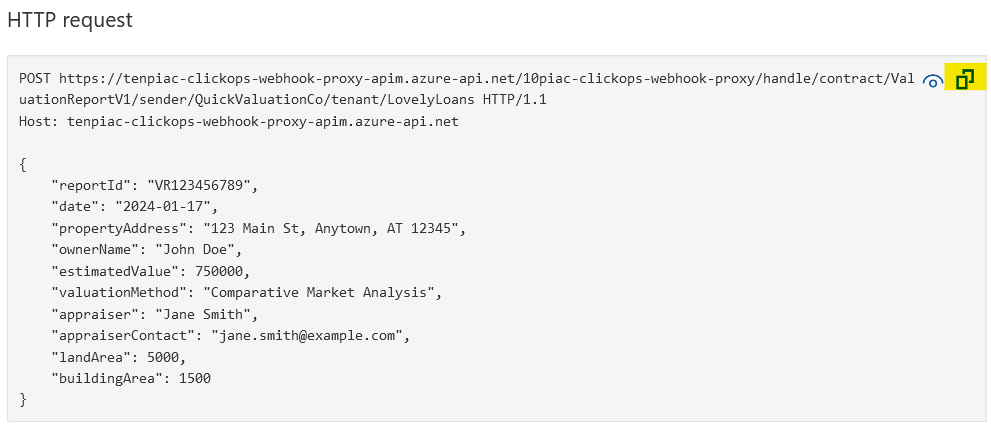
Using VS Code and the REST Client extension, you can paste the copied value into an .http file and you get the following.
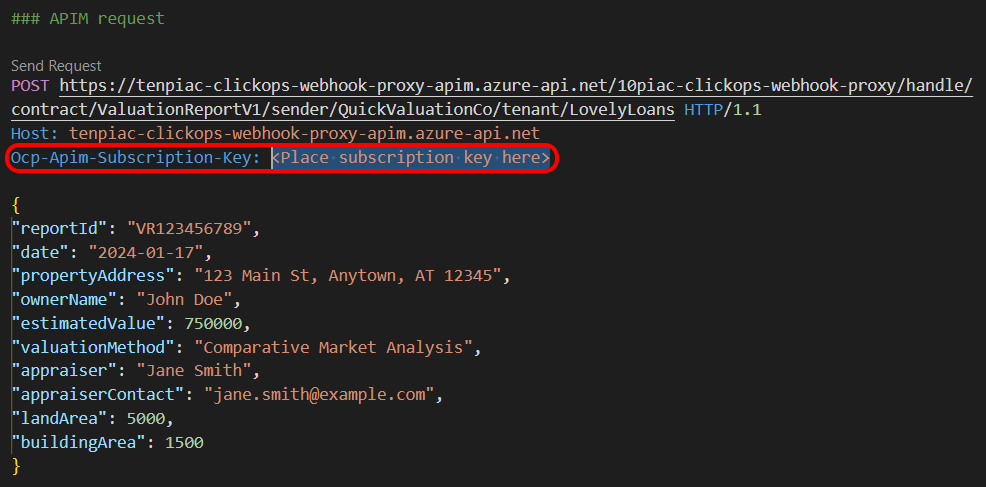
So all I needed to do was find a suitable subscription key. I went into the API Management UI and the Subscriptions blade. This listed three subscription keys that appeared to have been created by default.

I tried the first two primary keys, but neither worked. So, with some reluctance, I tried to select the 'all-access' key. The result was this warning.
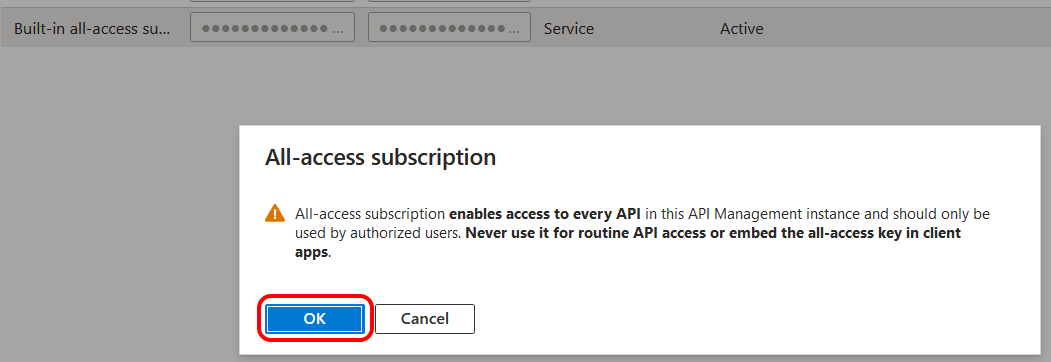
I decided to persevere and was able to successfully use the all-access key to make calls from VS Code. However, this was far from ideal and I wanted to work out how I would be able to issue and maintain separate keys for separate callers. So I clicked the option to create a new subscription.
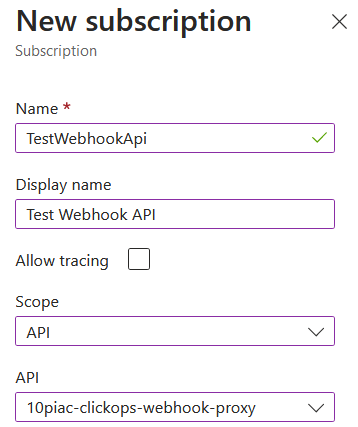
This was more like it. I could restrict the access of the subscription to a specific API. There was also an option to trace, but for now I did not explore it. Once created, the new subscription appeared in the list as shown below.

I copied the primary key locally and re-ran my test from VS Code. As hoped, this was successful and now I had a way of issuing and rotating keys that were scoped to just a specific API.
There was one more thing that was bugging me though. It was still possible to call the Azure Function directly from the public internet. Although this would require the function key to be leaked, it was far from ideal. So I started to look into how I could restrict access and remove this possibility.
Disabling public access to the function
I went into the Networking blade for the Function App and clicked on the link next to 'Public network access'. This brought up the options below with the 'Enabled from all networks' selected. My first thought was to disable all public access. Maybe access from API Management doesn't count as public.

However, a quick test showed that this wasn't the case. Sure, direct access had been stopped, but so had access through API Management.
Engaging with ChatGPT, there was mention of virtual networks and managed identities. The former I didn't want to get into at that point in time and the latter wasn't available at my pricing tier.
I asked ChatGPT "Is it possible to add an access rule to an Azure Function that restricts access only from Azure?" The response came back:
Yes, it is possible to restrict access to an Azure Function so that it's accessible only from within Azure services. This can be done by configuring network access restrictions in your Azure Function settings. However, it's important to note that "from Azure" can encompass a wide range of sources, including other Azure services, VMs hosted in Azure, or services running in Azure regions.
The suggestion from ChatGPT was to use an Azure Service tag in the network access restrictions. As it put it:
Azure Service Tags represent a group of IP address prefixes from a given Azure service, which are used to help minimize complexity for security rule creation. You can leverage these in your network security rules.
Given this, I selected the option to enable from selected IP address.

This brought up a list of rules and I clicked on the option to add a new one. Following ChatGPT's advice, I added a rule for the AzureCloud service tag.
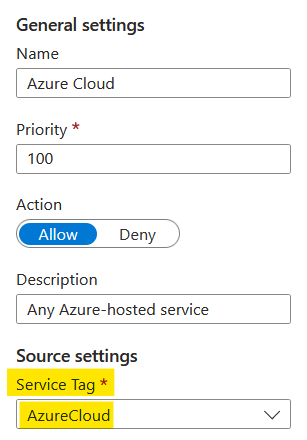
Once added, my new rule took pride of place at the top of the list. The portal defaults the unmatched rule action to 'Allow'. This isn't what I wanted, so I changed it to 'Deny' which resulted in the rule at the bottom.

Again I tested. This time I was able to access the function through API Management, but not directly. So I now had the behaviour that I wanted. However, ChatGPT did highlight these valid considerations for using AzureCloud Service Tag:
Broad Access: The
AzureCloudservice tag is quite broad and includes all of Azure's public IP addresses. It doesn't restrict access to only your Azure services but allows access from any Azure-hosted service, which can include Azure services used by others.Other Azure Services: If your intention is to allow access only from specific Azure services (like Azure Logic Apps, Azure VMs, etc.), you might need a more granular approach. You can specify the IP addresses or ranges of those specific services or use relevant service tags if available.
Summary
API Management appears to be a powerful tool to expose and manage external APIs. I barely scratched the surface of its capabilities, as I was satisfied in just knowing that my Azure Function was now behind a suitable service. There was an awful lot of clicking and it makes me wonder about how all this would be done through infrastructure as code.
Comparing this experience to the one I have had with AWS is interesting. With Azure, I had to find ways to stop my Azure Function from being exposed. With AWS, you have to find ways to expose your Lambda functions. With Azure, you have to pay for managed identity functionality to integrate API Management with Azure Functions. With AWS, you have to use Identity and Access Management (IAM) for everything and it is completely free to use.
However, I now have the front of my application in a place I want. So the next step is to look at extending the back-end functionality, which will mean integrating with Blob storage.
Links
Expose serverless APIs from HTTP endpoints using Azure API Management
Import an Azure Function App as an API in Azure API Management
Quickstart: Create a new Azure API Management instance by using the Azure portal
Authentication and authorization to APIs in Azure API Management
Enable advanced API security features using Microsoft Defender for Cloud

